Quick Start Guide
This guide takes you from a fresh sign-in to a project with a real weekly plan.
Before you start
Section titled “Before you start”- A modern browser (Chrome, Firefox, Safari or Edge)
- A Linear account, with at least one team and one project
- Permission to add labels to your Linear workspace — or an admin who can (the wizard has a path for restricted workspaces)
Step 1: Sign in
Section titled “Step 1: Sign in”Go to dubplanner.com and sign in with Linear. First time here? Use Sign up instead — it is the same authorization, on a page written for new workspaces.
Authorizing DubPlanner lets it read your teams, projects and issues, and write back the changes you make in the planner. See Signing in for what happens next.
Step 2: Let the wizard set up week labels
Section titled “Step 2: Let the wizard set up week labels”On first sign-in, DubPlanner offers to create the Week1…Week52 labels it uses to record which
week an issue belongs to. Accept, and the wizard creates the ones you are missing. If they already
exist, it says so and you press Looks Good.
You only do this once per workspace. You can re-run it later from Organization Settings → Reconfigure Labels.
Step 3: Open a project
Section titled “Step 3: Open a project”The sidebar lists your teams; expand one and pick a project. If you have a lot of projects, type into the search box at the top of the sidebar — it searches every team’s projects (and your saved views) by project or team name.
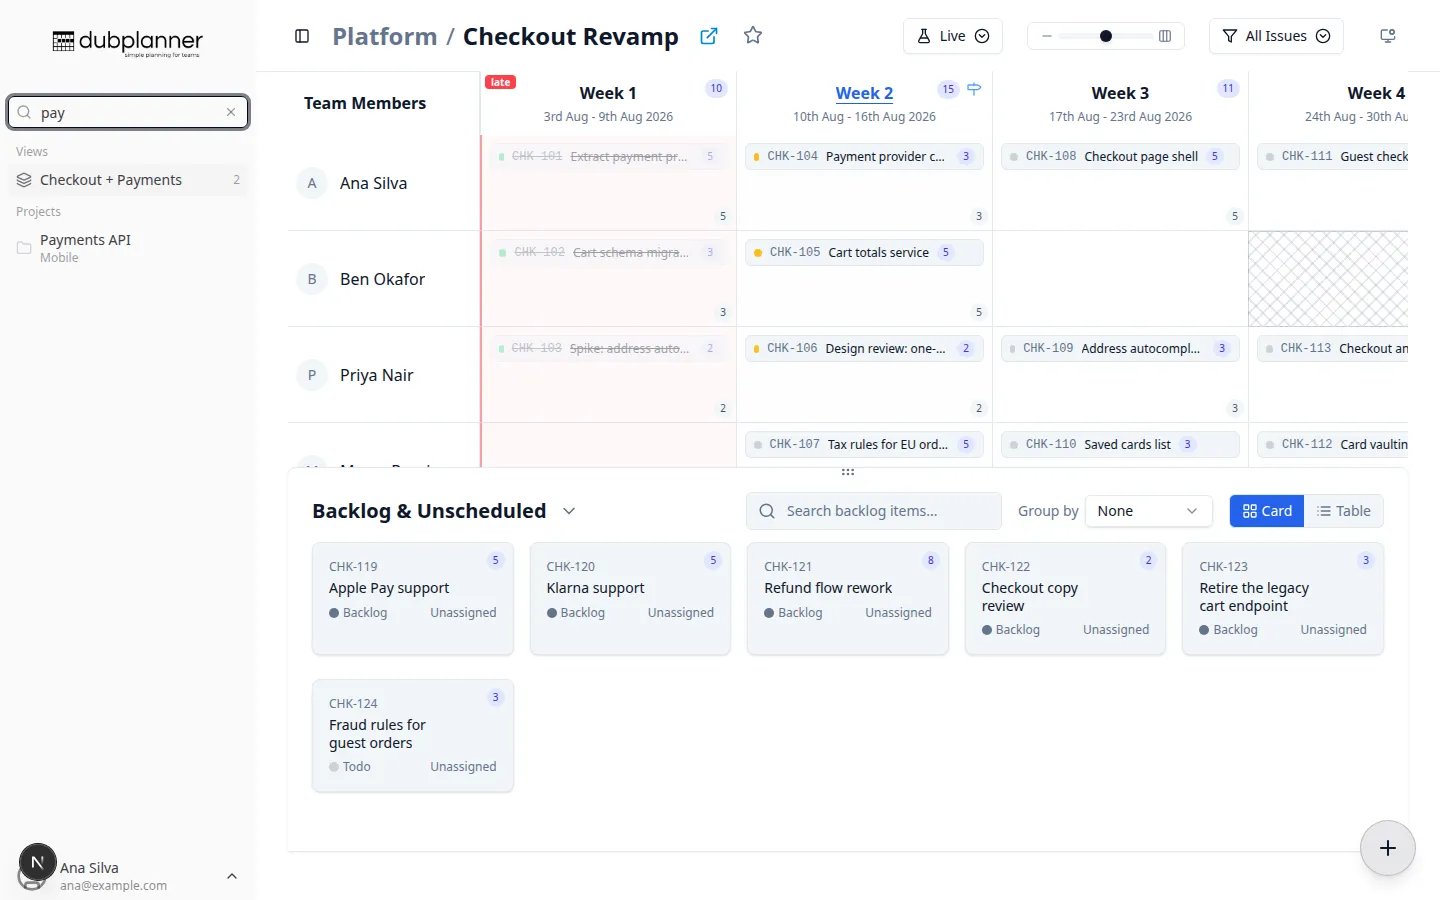
Star a project with the ☆ in the header to keep it in Favourites. DubPlanner also reopens the last project you were in, so tomorrow you can skip this step.
Step 4: Read the grid
Section titled “Step 4: Read the grid”The grid is your team down the side and weeks across the top. Week 1 is the week your project starts; the current week is highlighted, and the board opens scrolled to it.
Issues that have no week yet sit in Backlog & Unscheduled underneath.
Step 5: Schedule some work
Section titled “Step 5: Schedule some work”Drag an issue from the Backlog onto the cell for the person and week that should do it. DubPlanner
updates the screen immediately and writes the change to Linear in the background — assignee, and
the Week N label.
You can also:
- Drag between cells to move work to another week or person
- Right-click an issue to change status, assignee or milestone, or to create a sub-issue
- Press
C(or use the ✚ button, bottom right) to create a new issue
See Scheduling work for the full set.
Step 6: Book the time people are away
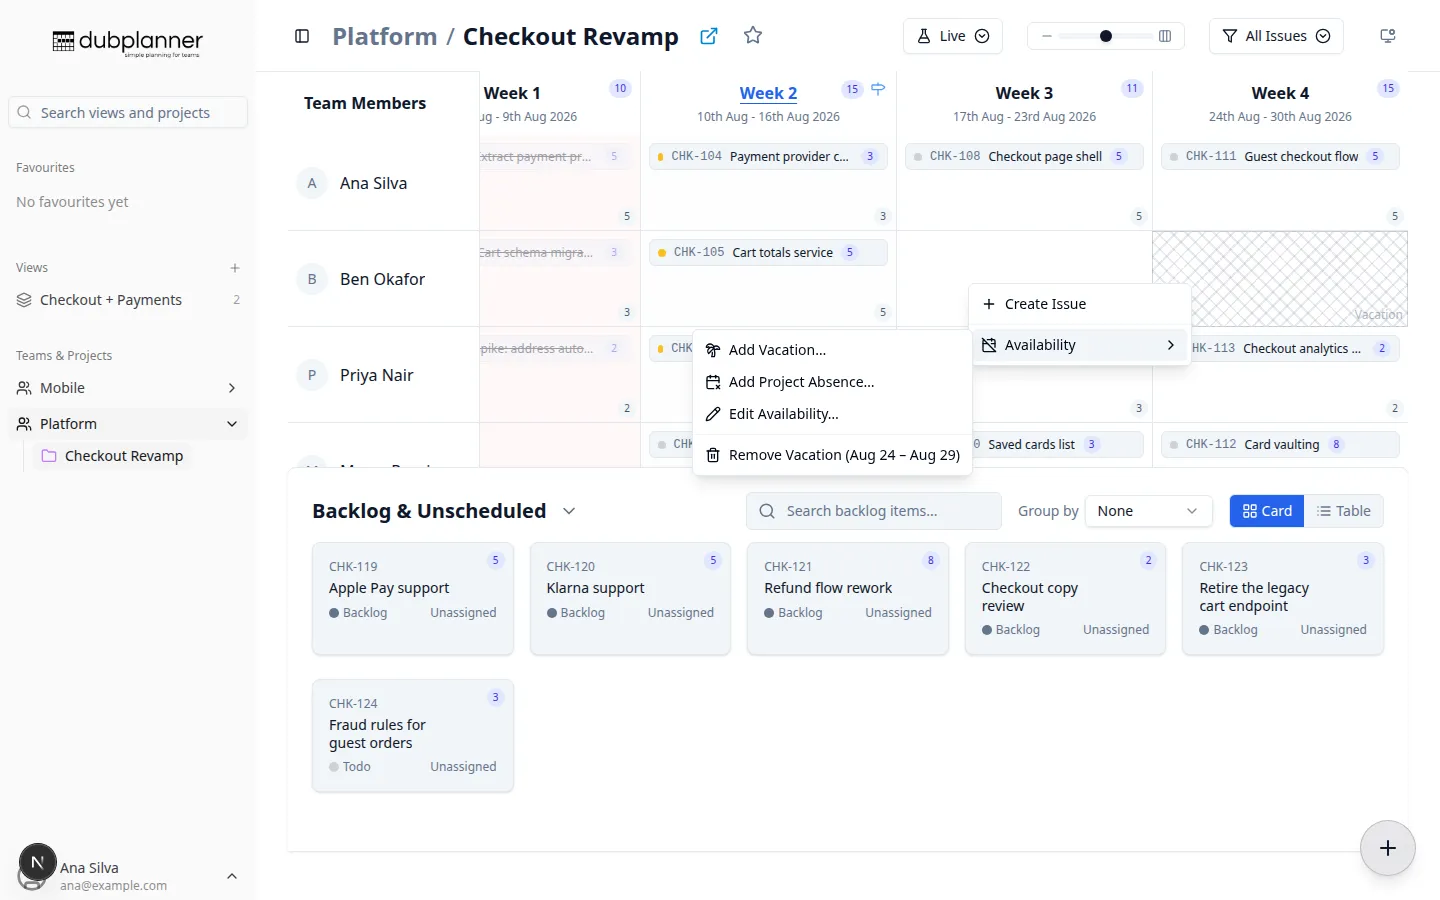
Section titled “Step 6: Book the time people are away”Right-click a person’s cell → Availability → Add Vacation…. The dialog opens prefilled with that week’s Monday–Friday, so you confirm rather than retype. Their row is shaded for those days, and week totals stop pretending they are available.
Step 7: Make it comfortable to read
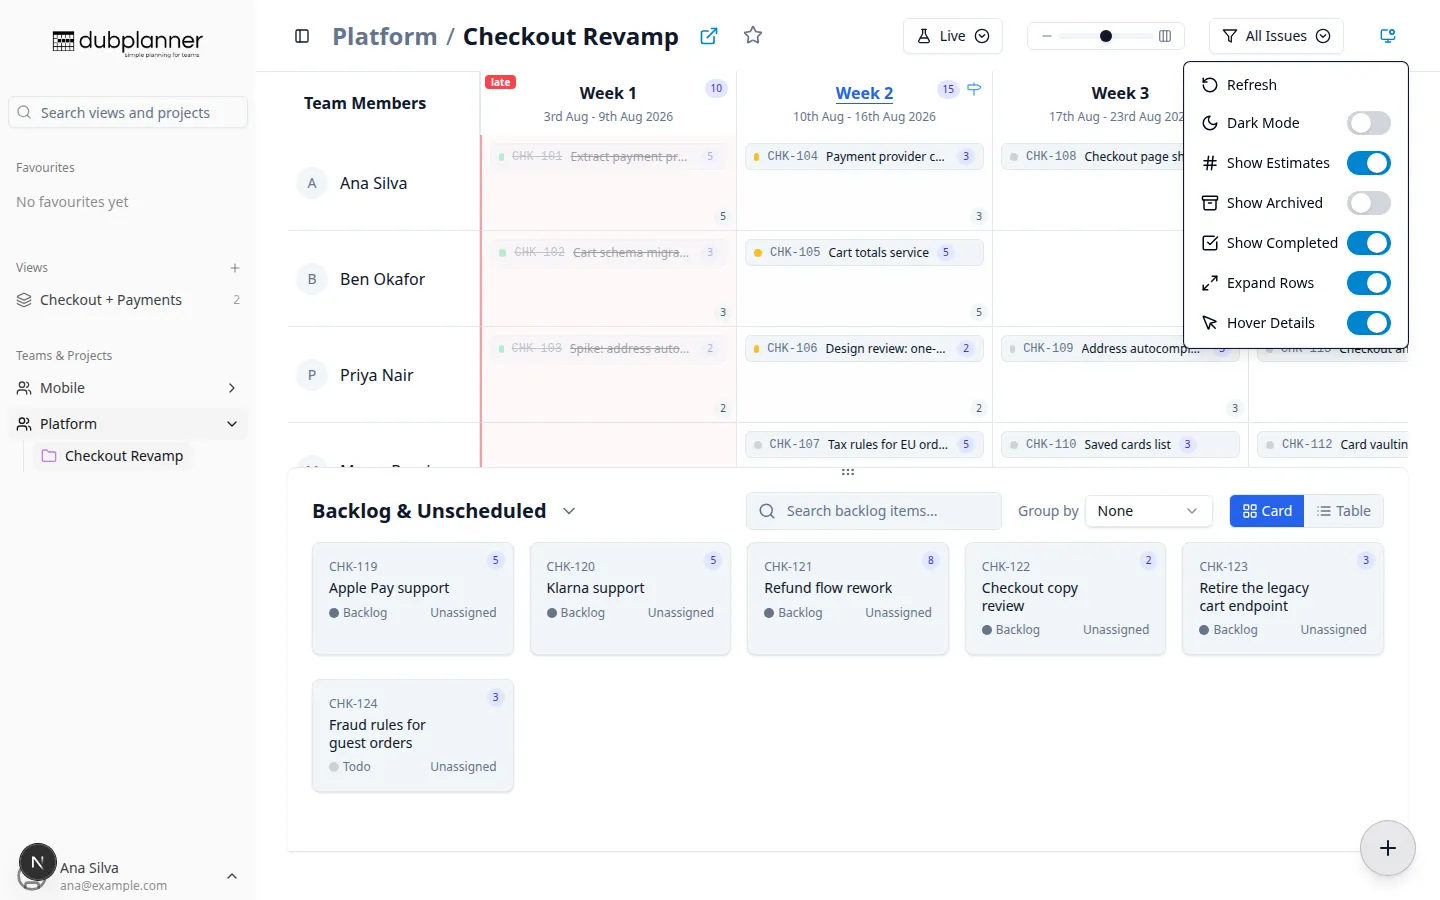
Section titled “Step 7: Make it comfortable to read”The display density slider in the header moves between five sizes, from tiny chips to large cards. The Display options menu (the monitor icon) toggles dark mode, estimates, completed work, archived work, expanded rows and hover details. Every choice is remembered.
Where to go next
Section titled “Where to go next”- The planner grid — everything the board itself does
- What-If mode — try a re-plan without touching Linear
- Custom Views — one board across several projects
- Keyboard & mouse — the shortcuts worth learning